
More Videos You May Like

How to: Knit Slip One Knitwise
-
1:37
We're all about quick, easy solutions to help you knit. Learn how to slip...
We're all about quick, easy solutions to help you knit. Learn how to slip...

How to: Knit Stocking Stitch
-
3:10
Learn how to make the most iconic stitch and you'll be ready for any...
Learn how to make the most iconic stitch and you'll be ready for any...

How to: Knit flat with circular needles
-
3:08
Does your project call for circular needles, or are you just partial to...
Does your project call for circular needles, or are you just partial to...

How to: Knit Horizontal Invisible Seam
-
7:23
Ready to sew your finished pieces together? Learn how to use the horizontal...
Ready to sew your finished pieces together? Learn how to use the horizontal...

How to: Crochet Turning Chain
-
1:36
In crochet, a turning chain can help keep your edges super neat and...
In crochet, a turning chain can help keep your edges super neat and...

How to: Knit Slip One Purlwise
-
1:31
New to slipping your stitches? This video will guide you through and help...
New to slipping your stitches? This video will guide you through and help...
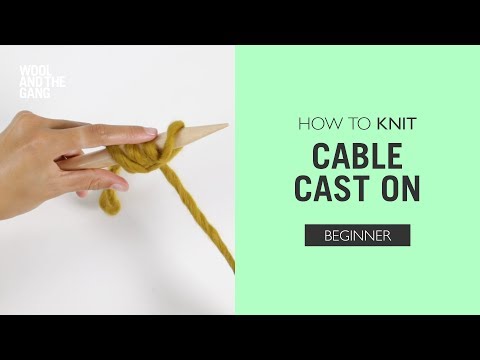
How to: Knit Cable Cast On
-
3:27
Learn how to master the cable cast on technique (also known as the knitted...
Learn how to master the cable cast on technique (also known as the knitted...
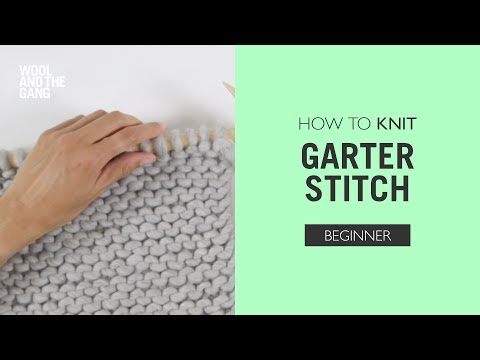
How to: Knit Garter Stitch
-
2:28
Garter stitch is a classic knitting stitch used by all levels of knitters –...
Garter stitch is a classic knitting stitch used by all levels of knitters –...
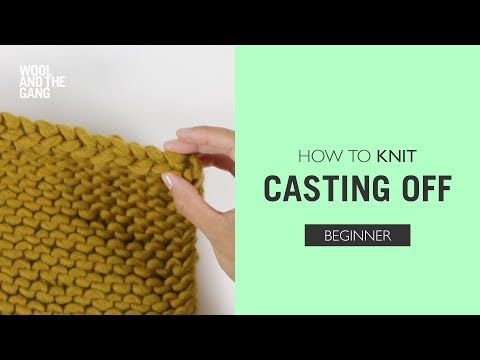
How to: Knit Casting Off
-
3:13
This video will teach you how to cast off your knitting at the end of your...
This video will teach you how to cast off your knitting at the end of your...
DIY Macrame Plant Hanger - Super Easy Step by Step
Brighten up interiors with a beginner-friendly macramé pot hanger. From start to finish, our tutorial will teach you all of the knots you need to make your own.
Brighten up interiors with a beginner-friendly macramé pot hanger. From start to finish, our tutorial will teach you all of the knots you need to make your own.
Read lessBrighten up interiors with a beginner-friendly macramé pot hanger. From start to finish, our tutorial will teach you all of the knots you need to make your own.
See the step by step guide here
Level:
Beginner
Craft:
Macrame
Type:
Kit guide
More Videos You May Like
![]()
![]()
-
More Videos You May Like
How to: Knit Slip One Knitwise - 1:37
We're all about quick, easy solutions to help you knit. Learn how to slip...
How to: Knit Stocking Stitch - 3:10
Learn how to make the most iconic stitch and you'll be ready for any...
How to: Knit flat with circular needles - 3:08
Does your project call for circular needles, or are you just partial to...
How to: Knit Horizontal Invisible Seam - 7:23
Ready to sew your finished pieces together? Learn how to use the horizontal...
How to: Crochet Turning Chain - 1:36
In crochet, a turning chain can help keep your edges super neat and...
How to: Knit Slip One Purlwise - 1:31
New to slipping your stitches? This video will guide you through and help...
How to: Knit Cable Cast On - 3:27
Learn how to master the cable cast on technique (also known as the knitted...
How to: Knit Garter Stitch - 2:28
Garter stitch is a classic knitting stitch used by all levels of knitters –...
How to: Knit Casting Off - 3:13
This video will teach you how to cast off your knitting at the end of your...


Step by Step

Step 1
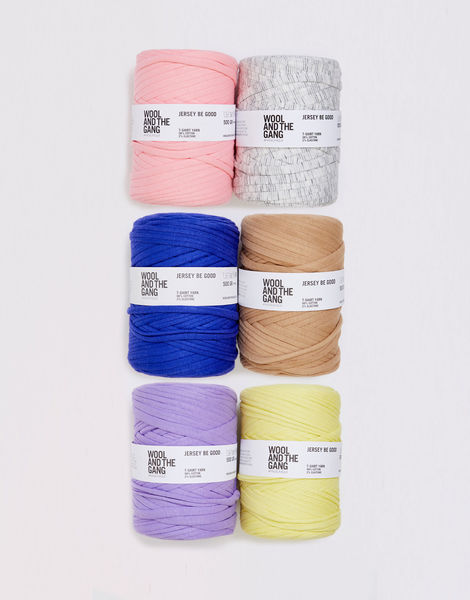
This how-to will take you through step-by-step to make your own macrame plant hanger! You will need a cone of Jersey Be Good, a trigger ring, a pair of scissors, and a measuring tape.

Step 2
To make your top of the pots plant hanger, you first need to cut 8 strands of the Jersey Be Good, all 550 cm / 216 inches in length. These are quite long lengths of Jersey, so make sure you take your time to make sure they don’t get tangled! Using your trigger ring, pass the 8 strands through the centre of the ring, and pull through until the strands are folded equally in half. You now have 16 strands to work with. It helps to have the trigger ring tied onto a door handle or chair whilst following this how-to!

Step 3
You are now going to cut another length of Jersey, this time 150cm / 59 inches. Taking this length of Jersey, you will use it to make a wrap knot directly below the trigger ring. The how-to for this knot can be found by searching “wrap knot” in the search bar at the top right of this page!

Step 4
This finishes the wrap knot. The knot can be pushed up to the top so that it is nice and snug against the trigger ring. When you have finished making your macrame plant hanger, you can trim the two ends.

Step 5
Now to move onto the next stage. You have 16 strands. You want to divide them into 4 sections, and we are going to work each section individually. Take 4 of the 16 strands and separate them from the rest. They will get tangled, so take your time de-tangling them!

Step 6
We are now going to make a half-square knot roughly 3 cm / 1 inch from the wrap knot. The how-to for the half square knot can be found by searching for “half square knot” in the search bar at the top right of this page! Repeat this half-square knot a further 22 times on the same group of 4 strings. Pull the knots tight after each half knot, to keep it nice and snug. This will create a lovely twisting braid of knots. Once you are done with this group of 4, repeat the 23 half-square knots on the other 3 groups of 4.

Step 7
Great! The image to the left illustrates the half square knot completed on the 4 groups of Jersey Be Good. You will also notice another type of knot further down here… It’s called the Josephine knot, and the tutorial for this can be found by searching for “Josephine Knot” in the search box at the top right of this page! :) The spacing between the last half square knot and the first Josephine knot is 4 cm/1.5inches, and the spacing between the 2 Josephine knots is 4 cm/1.5inches.

Step 8
We are now going to take one of the 4 sections, and make a square knot, which will start 4 cm / 1.5 inches below your last Josephine knot. The steps are similar to when you make a half square knot, but slightly longer. Arrange the 4 strands, and taking the strand on the right, pass it over the two middle strands, and under the strand on the left.

Step 9
Now take the strand that was originally on the left (it is now second from the left) and pass it under the two middle strands and through the loop on the right from back to front. Tighten the half knot so that it sits roughly 4 cm / 1.5 inches below the Josephine knot.

Step 10
To finish this knot and make it a square knot, we do the same 2 steps as for the half-square knot, but rather than beginning on the right, we begin on the left. Therefore pick up the left hand strand, and pass it over the 2 middle strands, and under the strand on the right.

Step 11
Now take the strand that was originally on the right (it is now second from the right) and pass it under the two centre strands and through the loop on the left from back to front. You have made your square knot! Tighten it up so that both halves of the square knot sit snugly together. Doing a square knot creates a braid that is flat instead of twisted. Repeat the process for the square knot until this section measure 6cm. You will be able to tell if you are doing it right as the knot will stay flat rather than twisting as it did for the half-square knot.

Step 12
When you have finished with the square knot for the 1st group of 4 strands, repeat a further 3 times on the other 3 groups. Make sure they all end at roughly the same point. It should look similar to the image on the left here!

Step 13
We are now going to start forming the part of the Top of The Pots Plant Hanger that the plant will sit in. Take 2 of the 4 sections that sit next to each other. With the section on the left, take 2 of the 4 strands that sit on the right, and with the section on the right, take 2 of the 4 strands that sit on the left. You are now going to make a square knot on these 4 strands, 7cm down from your previous group of square knots. This will form a new grouping of 4 strands.

Step 14
You will do this square knot a further 3 times, making new groupings by going around and taking 2 strands from the right-hand side of the section on the left, and 2 strands from the left-hand side of the section on the right. It should look like the image shown on the left here!

Step 15
Next you are going to create 4 new groupings again, by taking 2 of the sections that sit next to each other, and repeating what you have done in steps 13 - 14. Make these new square knots so that they sit 7 cm below the previous square knots. Your plant holder should look like the image on the left here!

Step 16
We are nearly there! To finish your plant hanger, we are going to make a normal knot 5cm down from the last square knots you made. There is no special way to do this knot! Just grab all 16 strands and tie them together. You will have to adjust the strands to pull the knot tight so that it sits nicely. Pulling the strands individually helps as well.You can cut the strands down to a length that suits you! Ta Da! A finished DIY macrame plant hanger! :)