
Autres vidéos qui pourraient vous intéresser

Point d'arcade
-
17:44
Dans ce tutoriel vidéo apprenez à maîtriser le point d'arcade. Il produit...
Dans ce tutoriel vidéo apprenez à maîtriser le point d'arcade. Il produit...
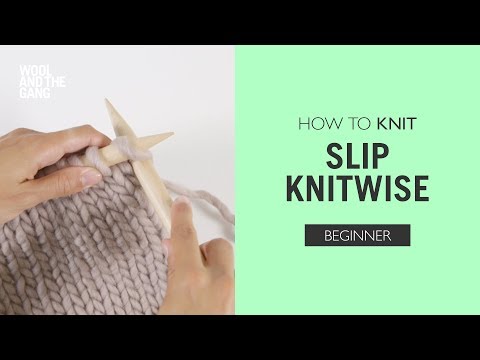
Glisser une maille à l'endroit
-
1:37
Dans cette vidéo, apprenez à glisser vos mailles à l'endroit (1 m. glis....
Dans cette vidéo, apprenez à glisser vos mailles à l'endroit (1 m. glis....
Relever des mailles
-
5:28
Dans cette vidéo, vous apprendrez à relever des mailles. Cette technique...
Dans cette vidéo, vous apprendrez à relever des mailles. Cette technique...
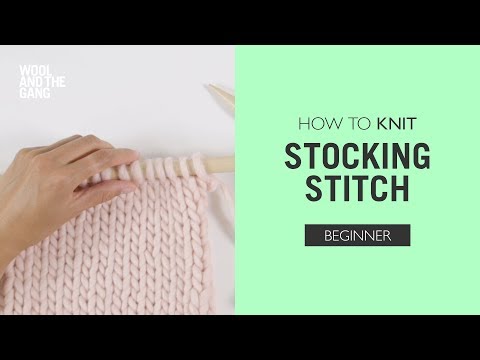
Point jersey
-
3:10
Apprenez à tricoter au point jersey pour être prête à réaliser n'importe...
Apprenez à tricoter au point jersey pour être prête à réaliser n'importe...
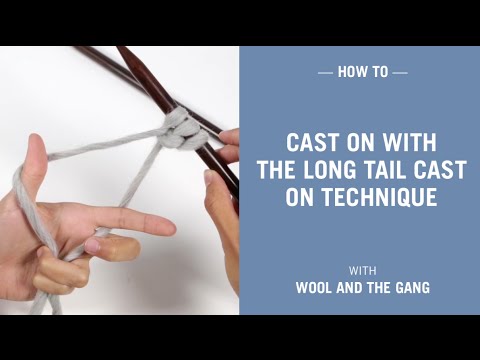
Montage continental ou suisse
-
3:12
Apprenez à commencer votre tricot avec notre tutoriel sur le montage...
Apprenez à commencer votre tricot avec notre tutoriel sur le montage...
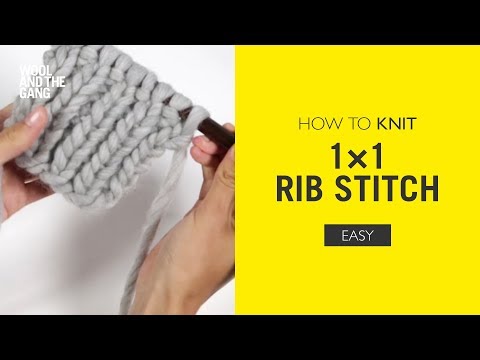
Côtes 1/1
-
3:13
Apprenez à maîtriser le point de côte 1/1 en suivant ce tutoriel vidéo...
Apprenez à maîtriser le point de côte 1/1 en suivant ce tutoriel vidéo...
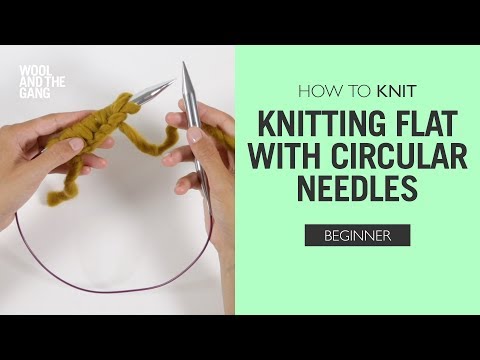
Comment tricoter à plat avec des aiguilles circulaires
-
3:08
Votre projet nécessite l'utilisation d'aiguilles circulaires, ou vous avez...
Votre projet nécessite l'utilisation d'aiguilles circulaires, ou vous avez...
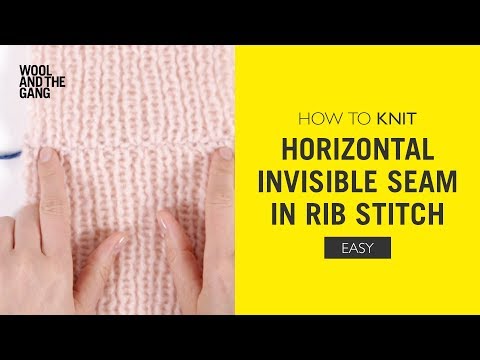
Couture invisible horizontale pour le point de côtes
-
2:42
Apprenez à créer des raccords invisibles lorsque vous assemblez des tricots...
Apprenez à créer des raccords invisibles lorsque vous assemblez des tricots...
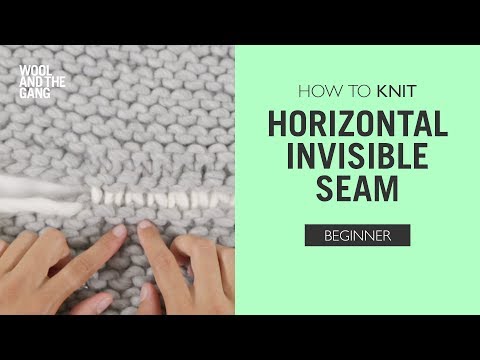
Couture invisible horizontal
-
7:23
Vous êtes prêt(e) à coudre vos pièces ensemble ? Apprenez ici comment...
Vous êtes prêt(e) à coudre vos pièces ensemble ? Apprenez ici comment...
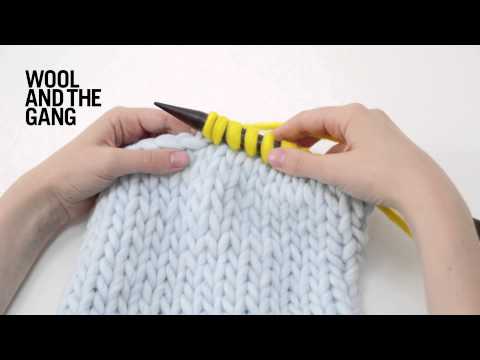
Comment utiliser des fils marqueurs
Dans cette vidéo, nous allons vous montrer comment fabriquer et utiliser un fil marqueur. Il est très utile lorsque vous travaillez dans le rond ou lorsque vous suivez un motif précis.
Dans cette vidéo, nous allons vous montrer comment fabriquer et utiliser un fil marqueur. Il est très utile lorsque vous travaillez dans le rond ou lorsque vous suivez un motif précis.
Lire moinsDans cette vidéo, nous allons vous montrer comment fabriquer et utiliser un fil marqueur. Il est très utile lorsque vous travaillez dans le rond ou lorsque vous suivez un motif précis.
Voir le guide étape par étape ici
Niveau:
Facile
Technique:
Tricot
Type:
Technique
Autres vidéos qui pourraient vous intéresser
![]()
![]()
-
Autres vidéos qui pourraient vous intéresser
Point d'arcade - 17:44
Dans ce tutoriel vidéo apprenez à maîtriser le point d'arcade. Il produit...
Glisser une maille à l'endroit - 1:37
Dans cette vidéo, apprenez à glisser vos mailles à l'endroit (1 m. glis....
Relever des mailles - 5:28
Dans cette vidéo, vous apprendrez à relever des mailles. Cette technique...
Point jersey - 3:10
Apprenez à tricoter au point jersey pour être prête à réaliser n'importe...
Montage continental ou suisse - 3:12
Apprenez à commencer votre tricot avec notre tutoriel sur le montage...
Côtes 1/1 - 3:13
Apprenez à maîtriser le point de côte 1/1 en suivant ce tutoriel vidéo...
Comment tricoter à plat avec des aiguilles circulaires - 3:08
Votre projet nécessite l'utilisation d'aiguilles circulaires, ou vous avez...
Couture invisible horizontale pour le point de côtes - 2:42
Apprenez à créer des raccords invisibles lorsque vous assemblez des tricots...
Couture invisible horizontal - 7:23
Vous êtes prêt(e) à coudre vos pièces ensemble ? Apprenez ici comment...
Présenté dans cette vidéo


Étape par étape

Étape 1
Coupez une longueur de fil de 10 cm. Il est parfois utile d’utiliser une couleur différente de celle dans laquelle vous travaillez, afin que vous puissiez la voir clairement lorsque vous tricotez.

Étape 2
Pliez le fil en deux et faites un nœud, en laissant une boucle un peu plus grande que la circonférence de votre aiguille.

Étape 3
Travaillez jusqu’à l’endroit où vous souhaitez ajouter votre fil marqueur de fil, puis glissez-le sur votre aiguille droite.

Étape 4
Continuez à tricoter jusqu’à la fin de votre rang.

Étape 5
Lorsque vous atteignez votre fil marqueur sur le rang suivant, glissez-le simplement de l’aiguille gauche à l’aiguille droite. Veillez à ne pas tricoter votre marqueur de fil !

Étape 6
Continuez à tricoter de cette façon, en déplaçant le fil marqueur à chaque rang.