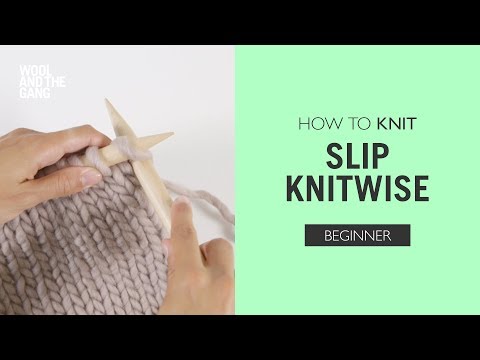
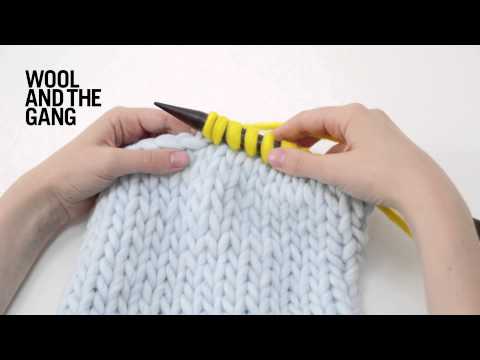
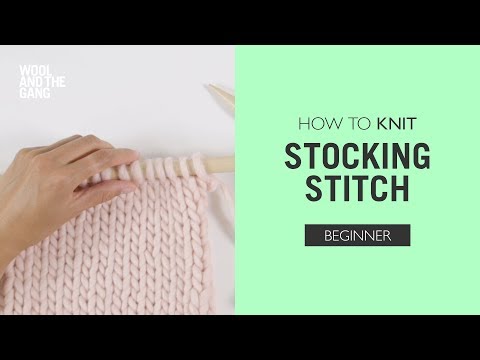
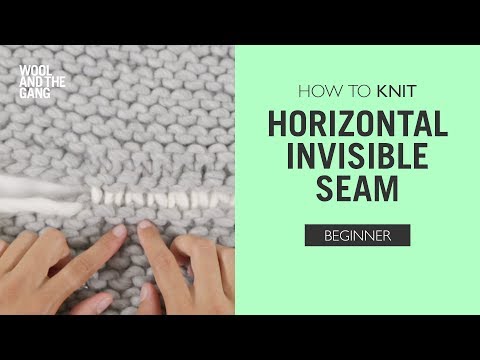
COSY UP CLUTCH CROCHET ALONG PART 2

In this video we'll walk you through how to finish the Cosy Up Clutch

Facts & handy tips

Featured in this video

Share the Love

Step By Step

1.

Now it's time to start working back and forth across your bag. Make one chain stitch and work in single crochet across 19 stitches.

2.

Now you are going to work back across these 19 stitches. Previously you were working in the round, but for this section, work back and worth.

3.

Turn your work, make a chain stitch and work single crochet back across these 19 stitches.

4.

When you've reached the end, repeat that step again, make chain stitch, turn your work and work another row of single crochet across these stitches. You'll now do this twice more. Work 2 more rows.

5.

Now that you've finished your 4th row, cut your yarn, leaving a good yarn tail and repeat the same section on the other top edge of your bag.

6.

Once you are done with the 4 rows of single crochet on the other side, your piece should look like this, with 2 flaps at the top.

7.

It's now time to put in your bag clasp. Turn your clutch inside out. For this design, the reserve side of the single cochet will be your right side, because it's got a nice unique texture.

8.

Use the tail of the yarn to sew in the bag clasp.

9.

Take your clasp, open it out and insert it into your bag and fold the top row of the flap over it,

10.

Thread your yarn tail with your sewing needle to stitch the clasp into place. Fold the edge of the flap over so it completely covers the clasp.

11.

Sew the bottom edge of the flap to the inside of your bag. You are gradually attaching it, forming a tube which completely conceals the clasp.

12.

Once you've stitched one half of your bag over the clasp, we are going to fasten this side off by making a few more stitches.

13.

Now repeat the same process on the other side.

14.

Now that you've sewn in both sides, it's time to sew in your ends. Weave the loose ends through the crochet, on the inside of your bag.

15.

Your crocheted Cosy Up clutch is now ready!

This is how you do it

Follow WATG on and hashtag
your pics using #shareyourknits