We’re showing you how to make a Patchwork Blanket! Make yourself snug as a bug with this beginner level project. Using knit and crochet techniques, this is a good all-rounder project that you can piece together over a few days or, if you’re feeling confident, sit yourself in front of Netflix and get it done in one fell swoop.
Time to make: 10 hours
Finished Size: 90cm/35.4’’ x 120cm/47.2
THE TOOL KIT
Approx. 1.2kg / 480m (522yrds) of super bulky yarn in your main colour. Our Crazy Sexy Wool is a perfect match but anything with a 4 wpi thickness will work. We used Crazy Sexy Wool in Ivory White
Approx 100g / 40m (43.5yrds) of super bulky yarn in your contrast colour. We used Crazy Sexy Wool in Lipstick Red
Pair of 12mm/US knitting needles
12mm crochet hook
Knitter’s sewing needle

THE INSTRUCTIONS
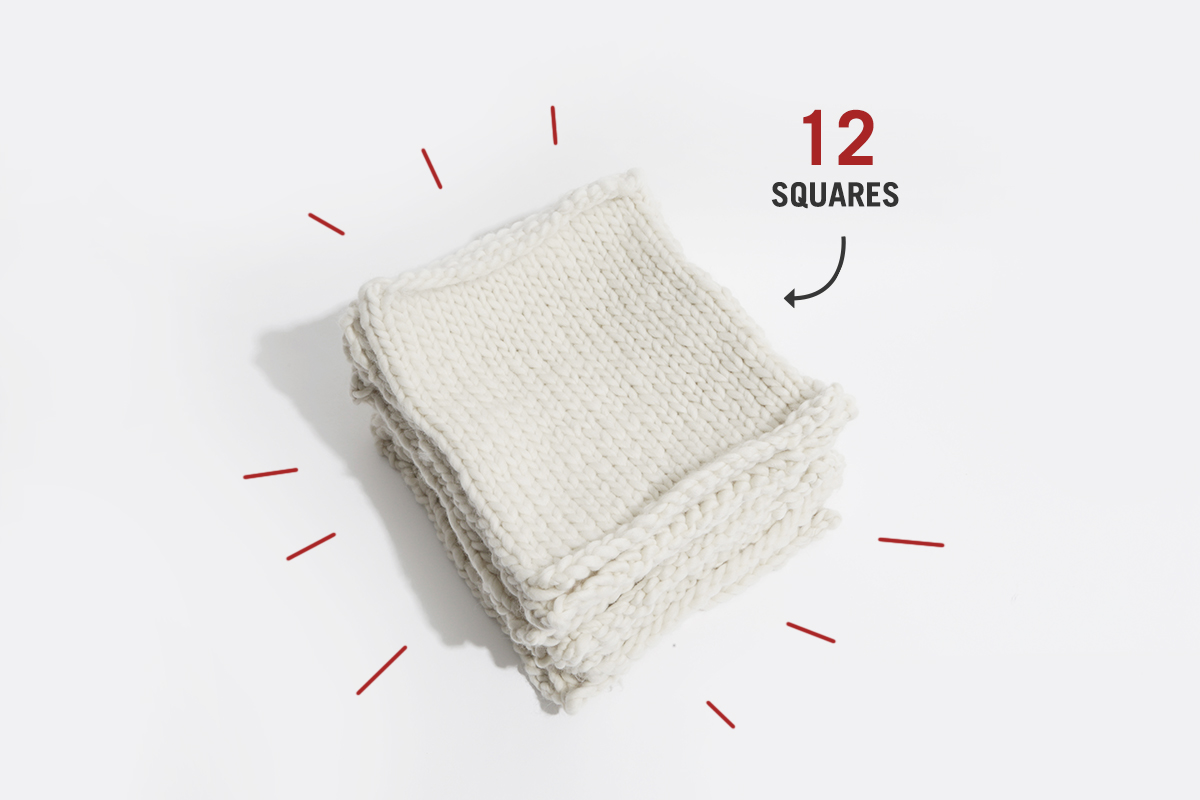
The blanket is made up of 12 squares, each measuring 30cm/12’’ x 30cm/12’’. Follow the instructions 12 times and you will have 12 completed squares.
-
Using your 12mm knitting needles and your main colour of yarn, cast on 21 stitches in your favorite way (we used a cable cast on).
-
Work in stocking stitch until your piece measures 30cm/12’’ from the cast on edge (approx. 30 rows).
-
Cast off.
Assembly
If you’re at this stage of the instructions, you should have a pile of 12 squares. You will now start to join them all together.
This blanket is designed so that the squares sit in an alternating pattern of right side facing up, then wrong side facing up. This makes it look fancy, yay. Here’s how you do it:
-

Take 2 of your squares and lay them next to each other, one with the right side (the little ‘v’s) facing up and one with the wrong side (the little bumps) facing up. You also want to position them so that the cast off edge of one of the squares is sitting against the side edge of the other square.
-

Use the perpendicular invisible seam technique to join the 2 squares together.

-
Pick up the next square from your pile and join it to your established blanket, being sure to continue the ‘right side, wrong side’ sequence. When you have 4 squares in a row, you will start to build your blanket upwards. Again, make sure you always alternate right side and wrong side squares.
-


When you have finished, you will have a blanket made up of 3 rows of 4 squares. One side will have subtle, almost invisible seams and one will have bulky, protruding seams. We love both sides and think this fella can be classed as a reversible blanket, right? -
To make the blanket feel a little more ‘pro’, we will work a single crochet edging around the whole thing.
-
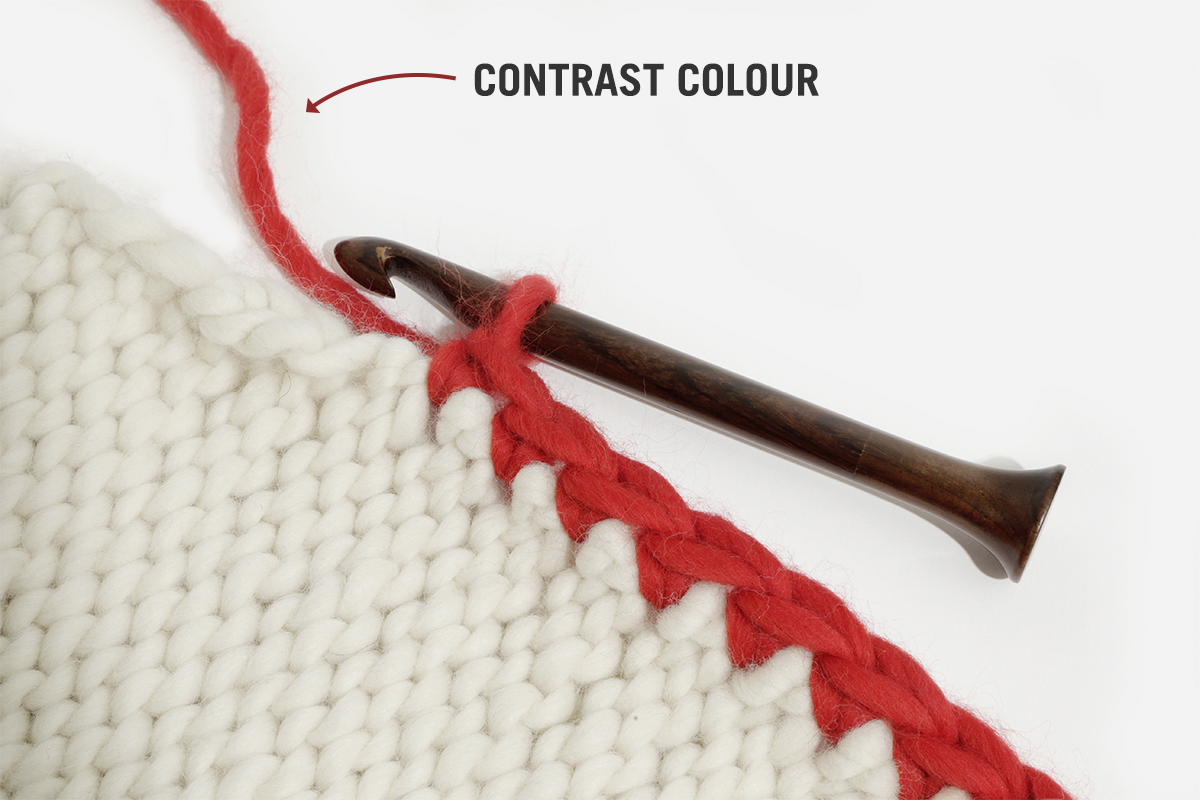
Using the 12mm crochet hook and your contrast colour, work in single crochet around the edge of the blanket.

When in a corner space, work 3 stitches into one space to make a nice neat angle.
-
Finish off by hiding any loose ends.

All done! What’s next?
——————————————————————————————-
This is post #1 in our ‘12 Days of Making’ series which sees us posting a new how-to project every day for 12 days. To see what’s up next and to make sure you don’t miss anything, follow us on Facebook, Twitter and Instagram for live updates. Happy making!